Saturday, 8 February 2014

Mojo starter

Hi folks,

Well I've been struggling to acheive much modelling wise, lately, instpred by a few things and have lots of started but not finihsed builds.

Luckily I was browsing the UAMF when I came across a group build that was starting that, I had enthusiastic joined, when it was mooted, and had forgotten about. Just the thing to kick start the modelling. Something I have to regularly work on, post about, to avoid the embarrassment of letting the group build members down.

So the UAMF is having a twin prop fighters group build, runs all this month of February, and is progressing well after teh first week. There is great a range of subjects, ( and some very friendly fellas and a fellass ) quite few Airfix Me110, a couple of P-38s, Mosquitos, and Whirlwinds, a F82, a Revell Kawasaki Ki-45 'Toryu' "Dragon-Killer", with a couple of rarer ones, the Airfix Do-217J, a Heller Potez 631, and a Planet Models Xp-38 Chain Lightning.

I am doing a Fujimi 1/72 Me 110, as a C-6 night fighter using some Owl decals I have. 


So a bit of scratch building for the gun pod, and a nice black scheme.

 She will be crewed up and inflight, luckily the kit has a couple of smallish crew.
 No detail the in the cokpit, so scratch build some imagination detail.
All painted up and ready to join so, I can crave out the channel for the gun,

I back the floor of the nose cone with plasticard, in case of fill through and filed a groove.

 Using the nice plans in the Owl decals, I cut out some forms for the gun pod, which I've filled with milliput.
 While letting the milliput to harden up, I attacked the wings, the under carriage doors are best meant for using open.
Also boxed in the radiators and after a bit of filling and sanding we have much better looking closed under carriage doors.
 Also modified the oil cooler intakes on the engine nacelles, the unmodified kit part is on the right. Trimmed the centre hump down and then opened up the intake..
Much nicer.

If you'd like to join in the group build pop on over to the UAMF and join in, they are a very friendly bunch.

Cheers
Jim

Tuesday, 28 January 2014

Sprue Cutters Union #26 - Glue

- What glue(s) do you use, and how do you apply them? -

A simple one this one, what we use and do..

Glues used on the dinner bench are, from most used to less used:

Tamiya Extra Thin
Used for all the major construction on a kitset, and applied with the great fine brush supplied with the bottle.

It's my everday cement for plastic parts, I love how you only need a little, and how it evaporates quickly if you get it where you don't want it, just don't touch it, or you'll be repairing a smear mark.

Super Glue/CA cheap thin stuff, and Selleys thick type

These I tend to use mainly for filling and dissimilar materials, metals to plastic etc.

Applied with one of these two applicators:

Toothpick with a section of fine copper wire wrapped around it. Can pick up small amounts of glue, and when tip gets build up on it, just pull a bit more copper wire out.

When I need a large dollop.. 
It's sewing needle, stuck into ta bit of wooden chopstick, then the tip of the loop snapped off, and lightly sanded the sharp edges off.

I made a couple of these and use them for applying CA accelerator as well. Lets you get a small amount of accelerator onthe CA with out it flowing everywhere.

Helmar Tiger Grip PVA type glue

This stuff, I found in a craft store and is my favourite pva type glue, sets up quite quickly, thins with water. I use it for glazing windows, occasionally canopies, little canopy fill jobs and attaching parts during the final assembly after paint.

Normally I apply it with a tip of a toothpick, or a paint brush.

Tube Poly Cement
I use tube glue for the large four engine builds I have done, for the wing root attachment points, where the fit isn't as good as it should be, and I want to make sure I get a bond all the way across the joint surface.

Applied with a toothpick or when feeling brave, straight form the tube.

Five Minute Epoxy
Cheapo five minute epoxy, which I've use for reinforcing joints. 
Applied with a toothpick, or a thicker stick.

All the best.

Jim

Stick around with the other unionists:

Wednesday, 22 January 2014

Sprue Cutters Union #25 - Time Management

- How do you find time for the hobby? -

I could do with one of these for the hobby...

also essential to sort out that stash....

At my most productive, (three years ago), I was pretty determined at setting modelling times, and I regularly joined group builds, so with that being a good incentive I would get up at 0530, get an hour in before the family arouse. As we had a little one in the house who still had mid day naps, I was able to grab an hour at lunch time, then at the end of the day, after the kids were put to bed, and after I had read a couple of stories to them I used to get an hour or so. So with aound 3 hours a days I used to get through a few kits happily.

Unfortunately, the time hasn't been as easy at find over the last year, a bit of volunteering at the kids school, and some paying evening IT work, saw the modelling drop off the radar. Now I am lucky if I manage to steal an hour in an evening. 

I think one of the reasons, is that I am a kitchen table modeller, so things have to pulled out to start doing anything, and popped away afterwards, just a bit of a mental hurdle to have a nibble of modelling.

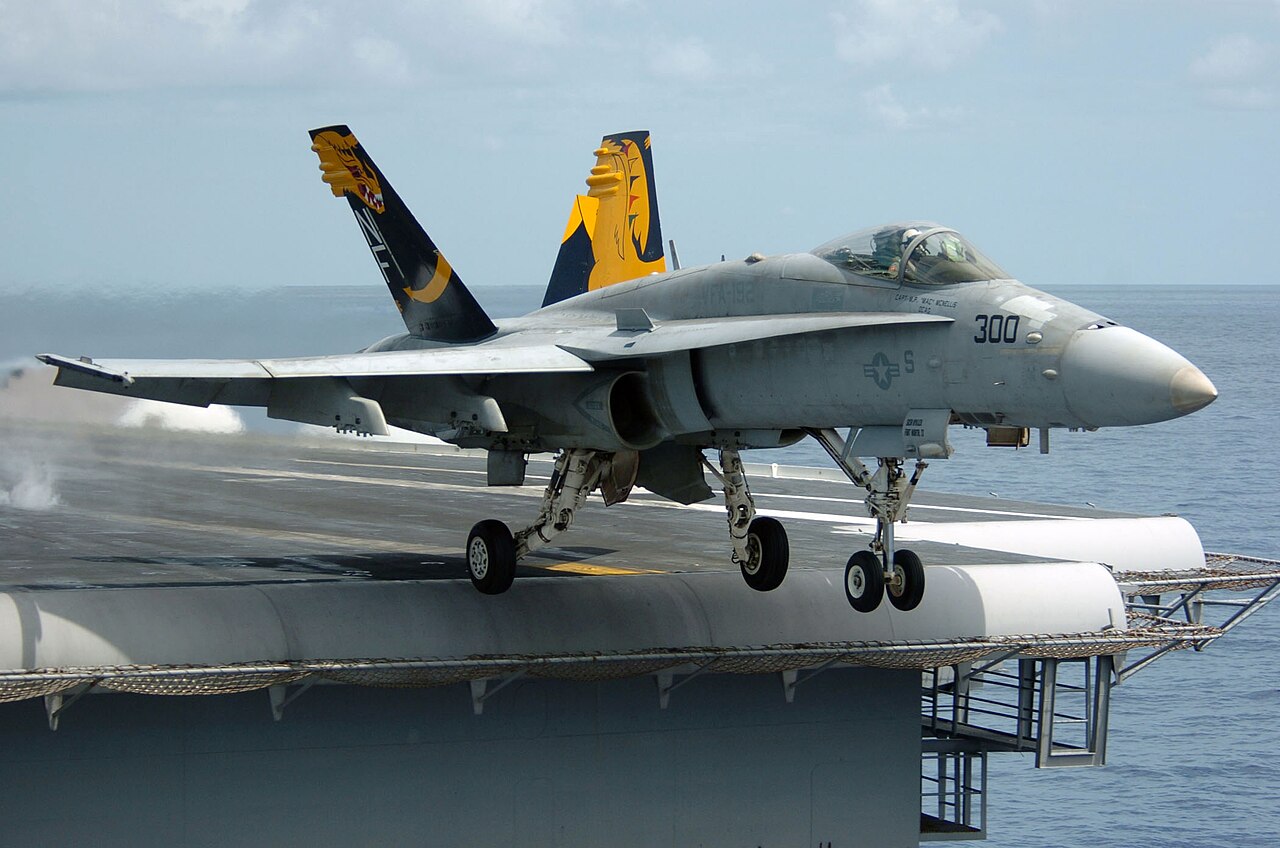
I have committed to a couple of group builds coming up, and this photo:

 has inspired me to dig out an old Hornet kit, so hopefully a bit of incentive to keep it bit more regular.

All the best

Jim

Sprue Cutters Union # 24 - Pet Peeves

- What do other modelers do that gets under your skin? -

Cat pictures and selfies they really get my.. oh hang what Modelers do..

Honestly I don't care what other modellers do, I used to and thought, how could you possibly do that, but then I realised, woop de bloody do, do what you like, I'm not paying for it. I have no buy in to how you build a kit, do it the way you like, and I'll look at and maybe copy a technique, a scheme or not, and I'll do it my way too.

It is such an individual hobby, that you really make it your own, with your own idiosyncrasies of doing things, that's cool, probably one of the enjoyable things about the hobby, seeing how all of us produce differing results.

The thing that really gets me, is the online behaviour of people who think a kit is a real life object put in a shrink ray. Really? really? these kits are not a miniaturised real life object, they are representations of an object, and end up being your individual representation of a subject, which will be completely different to my view, or to the next modeller, or to my wife or children. Just chill and enjoy the fun of it.

Probably due to the reaction I have had to posting pictures of my models with prop blurs. To some it really is the anti-deity risen: "You don't see the blades blur in real life, they only look like that in photos!"  Shit a brick, I'm not making a real life plane, its a model guys! I like prop blurs on a subject, get over it.

Cheers
Jim

Here's what peeves the Union:

Thursday, 9 January 2014

A-10B Conversion - Moulding time...

Hi all,

Got the old  modelling mojo back, and over the last couple of days I've gridded my loins and started moulding the crew figures..

I modified a figure I had, got two right arms, one holding a rod as a joystick and the other slightly extended, like reaching for a panel. Also got a second head and added the visor cover, so there is an option of two heads for the figure and two arms.

Got some silicone mould making ingredient and some resin and started off. Out came the Lego and plasticine..

 Mixed and poured one half, after a coat of vegetable oil as a release coating...

 Removed the plasticine a bit more oil, Legos to box, mix and pour sliicone again..
And we have a mould.

So today out with the resin..
and we have the first casting out...
A bit of feathery flash to clean up but looks ok, so on to number two.

Since I like having crew in my models, I quickly run out of plastic figures, so this will hopefully save some time and effort. I need to do about four copies as I have a Tornado as well as the A-10 to crew up. The next time I do some WWII crew, I'll make a mould as well, and should solve my lack of crew.

Off to pour some more resin..
All the best

Cheers
Jim

Sprue Cutters Union # 23 - Something to Talk About


The topic for the union is:

- What three topics would you like to see the Union address? -

Number 1.  
Finding time, how do you find time for the hobby? Are you super organised and have a set modelling schedule or snatch what hours/minutes/seconds you can?

Number 2.
Is the hobby still a pocket money hobby?

Number 3.
Are you an assembler, or do try to does each model become individual to you? That one little mod you have to make, or scheme that is slightly different.

All the best,

Cheers
Jim

Sunday, 24 November 2013

SprueCutters Union # 18 - Inspiration

- Where does the inspiration for your next build come from? 

I was struggling this week to think up an answer to this, been busy thinking of other things, and not really in the modellers analytical frame of mind... thinking I might skip it this week, then today I saw a post on the The Aviationist it sums up what gives me inspiration...
http://theaviationist.com/2013/11/23/a-10-ang-photos/
I've said it before I'm an action junky as far as planes and models go, and these photos, are the stuff that gets me all plastic fondlerly(?)

So inspiration is easy with cracking images like those, now finding the time and scale back what I think I can to my achievable levels.........

You never know I may even do a bit more on the A-10B I've started..

All the best

Jim

Check out all the inspiring posts for the other Unionists...

Minature and Model Painting
Mattblackgod's World
The Eternal Wargamer
Yet Another Plastic Modeller

Thursday, 14 November 2013

Happy surprise...

Hi folks,

Been browsing Hyperscale and noticed the preview of the Zvezda 1/48th Su-2, and had to stop and have a second look...


That is a stand!, and is that crew under that canopy?

Oh yes,

Figures on the sprues!

http://www.zvezda.org.ru/?lng=1&nav=&cat=7&set=4805

As an inflight guy, seeing a company produce a new tool kit, with stand and crew figures... just got to get out the happy dance...
All the best

Jim

Wednesday, 13 November 2013

Sprue Cutters Union #17: Go Big or Go Home

Well what a big question for the union this week, - If you had the resources, would you attempt one HUGE project? -

Easy, no, no way, nada.

A big project would be sure fire, started and guaranteed not completed project. I need to see the end in sight, and a huge time wish detail packed project, I would fail completely.

The only way a huge project would happen, is if I was part of a group, and was doing a portion of a project, then the incentive to not let the others down, and people to interact with would carry me through.

I do admire the tenacity and dedication that people put into huge projects, the finest details, the sheer size of some things, the width and breadth some projects cover, all too overwhelming, full of traps and side tracks for me to wander down though.

So I'll stick to my one subjects, at least I have a better chance to finish them.

All the best

Jim*

* Who is struggling to find some modelling time lately.

Check out the other Union Members BIG HUGE posts:
Kermit's Bench
Lt. Smashs' Models
Digital Sprue - New to the Union
The Scale Workshop
Miniature and Model Painting
Migrant's Wanderings
Scale Model Workbench
The Eternal Wargamer
Doogs' Models
Mattblackgod's World
Yet Another Plastic Modeller
Motorsport Modeller
The Combat Workshop

Wednesday, 6 November 2013

Sprue Cutters Union #16: Brush Up


This week's question posed byt the Unions esteemed leader is: What is your preferred airbrush/paint brush manufacturer? 

As most, by primary paint coverage instrument was the brush, and whatever our small stationery/hobby shop stocked, the good old Hayden white synthetic brush, Which once I found you put a section of cut drinking straw over the ferule and bristles kept a good point, I also learnt that by washing the brush in a mild detergent solution after finishing a Humbrol enamel painting session they seemed to last longer as well.

Then I saw some modelling books showing airbrushes, oh gosh one of my first "tool lust" periods, I must. must. need. need to have one of those! The dual action looked too complicated and was too expensive, but one Xmas I got a Badger 250 single action, external mix. siphon with a pressurized air can and a car tire valve adaptor. After using the air can, it was out with the spare car tire, and regular trips down to the service station to refill it, I was a slave to pressurised air.


Was it the must have tool? Well I was impressed with the smooth coverage, I think the first thing I painted was a Tamiya King Tiger and the mottling was fun, then a a gloss red Kawasaki GPZ400. (which introduced me to masking tape) looked great, much smoother than my brush work. But I had impressions of paint fine lines and using it like a one stop hair line  to 4 inch coverage tool, which it certainly wasn't, I thin the finest width line I ever got was about 3mm

After the work, girls, work, and family hyatis, I got back into the hobby, and since I had more cash to spend, I had to get myself an airbrush, those dual actions still looked too complicated and much too expensive for my Scrooge blood, so I bought a Tamiya Sprayworks  basic set, an internal mix gravity airbrush, with a compressor, that runs on RC batteries, or a separately available power adaptor. As soon as I got it I put together a power supply to run the compressor. What a revelation this tool was, almost met my ideal of thin lines to broad strokes and what a finish, I had moved to acrylic paints Gunze Aqueous and wow they spray great, only thing here is they are more expensive than Tamiya (the Scrooge again)

So after a bit of playing, it has a single action trigger with a thickness adjustment on the top, I decided it was good, but not fine enough for me. One of the benefits of the Tamiya Sprayworks system is that they do other airbrushes with adaptor parts so you can you them on the compressor that comes with the basic set and I purchased my next airbrush the Spray-Work HG Super Fine Airbrush a 0.2mm needle brush, that feels like a quality instrument (I did see on the web that they are made by Iwata Medea but what you read on the web ....), feels lovely in the hand, and can with the supplied valve use it with the Spraywork compressor.

When used with the Sparaywork compressor and valve it effectively has no dual action, no down action to start the air, just pull back for paint, which was fine for a while, great results I could go reasonably fine, once I played with paint thinning, but I started to get the itch for n air supply that didn't motor boat away, or wobble about, so I bought a generic compressor with a small air tank.

Put the dual action valve part back on the Spray Work HG airbrush, connect her up and we have a proper dual action air brush, it was like night and day, that adjustable air pressure and control with the dual action, wow, it turned the airbrushing from a laying down of paint, to an engaging organic process, I feel alive! oh well it was very exiting..

After bathing in the joys of cleaning the gunk of varnishes out of the Tamiya HG, I decided to get a second airbrush a generic Chinese cheapie, about $30NZD, makes a good second airbrush, and I use it just for varnishes, to keeping the Tamiya for paint.
0.3mm gravity fed dual action, feels solid in the hand, not quite the good fine fit and engineering of the Tamiya, the bowl has sharp corners so harder to clean out..
Chinese Generic
Tamiya HG Super Fine

Sprays nice fine lines..
and sprays the varnishes etc just fine.

Certainly not the quality of the Tamiya, but it works ok, and does me as a second airbrush, certainly you couldn't complain at the price.

So after my long winded airbrush history, I will just present my current favourite brushes...
I discovered these in a one off auction on our local internet auction site, (Scrooge factor again) and wish I could find more, they are GSI Creos Mr Brush brushes, and they are fantastic the bristles keep their shape, hold paint well, and hold their tip, the bristles are longer than normal, leave nice strokes, the handles are sticky rubbery and quite fat so are nice to hold, they feel like a solid quality thing, a real delight to use.

So there are my instruments of painting mayhem, looking forward to seeing the Union's mix of painting instruments..

All the best

Jim

Check out the other Union members:

The Combat Workshop
Lt. Smash's Models
Kermit's Bench
Migrant's Wanderings

Sunday, 3 November 2013

Sprue Cutters Union #15: Everybody's A Critic

This weeks question for us to mull over is - What do you think makes an outstanding finished model? -

There seems to be multiple models/subjects and styles that can make me stop and go

I mean I appreciate a pig's ear kit turned into a silk purse, and some of these marathon efforts certainly stop me in my tracks, as I have battled with a few ahem, challenging builds. So assembly/scratch building skills must be one of those things that I can appreciate.

If something has that 'real' look, the combination of weathering affects, stops me too, so those wicked finishing skills must be something to make me wow.

Hands down makes me stop and go "wicked" every time, is the action model/diorama involving figures, bring the human element/scale to a subject and I'm all yours.
There has been an example on Hyperscale this week, a Hellcat on fire diorama,
from an image that someone found on the web.

I'm an action scene sucker, and this little one is my latest "Totally wicked", you can feel the heat, and the drama "Run man, run!" I've been recalling this little diorama since I saw it, putting myself in the pilots place, trying to imagine feelings of getting out of there.

All the best

Jim

Check out the other Union members thoughts here:

Yet Another Plastic Modeller
The Eternal Wargamer
Motorsport Modeller
Mattblackgod's World
Miniature and Model Painting
Scale Model Soup
Scale Model Workbench
The Combat Workshop
Martin's Bench Corner
The Scale Workshop - New to the Union
David Knights' Weblog
The Classic Kit Junkie